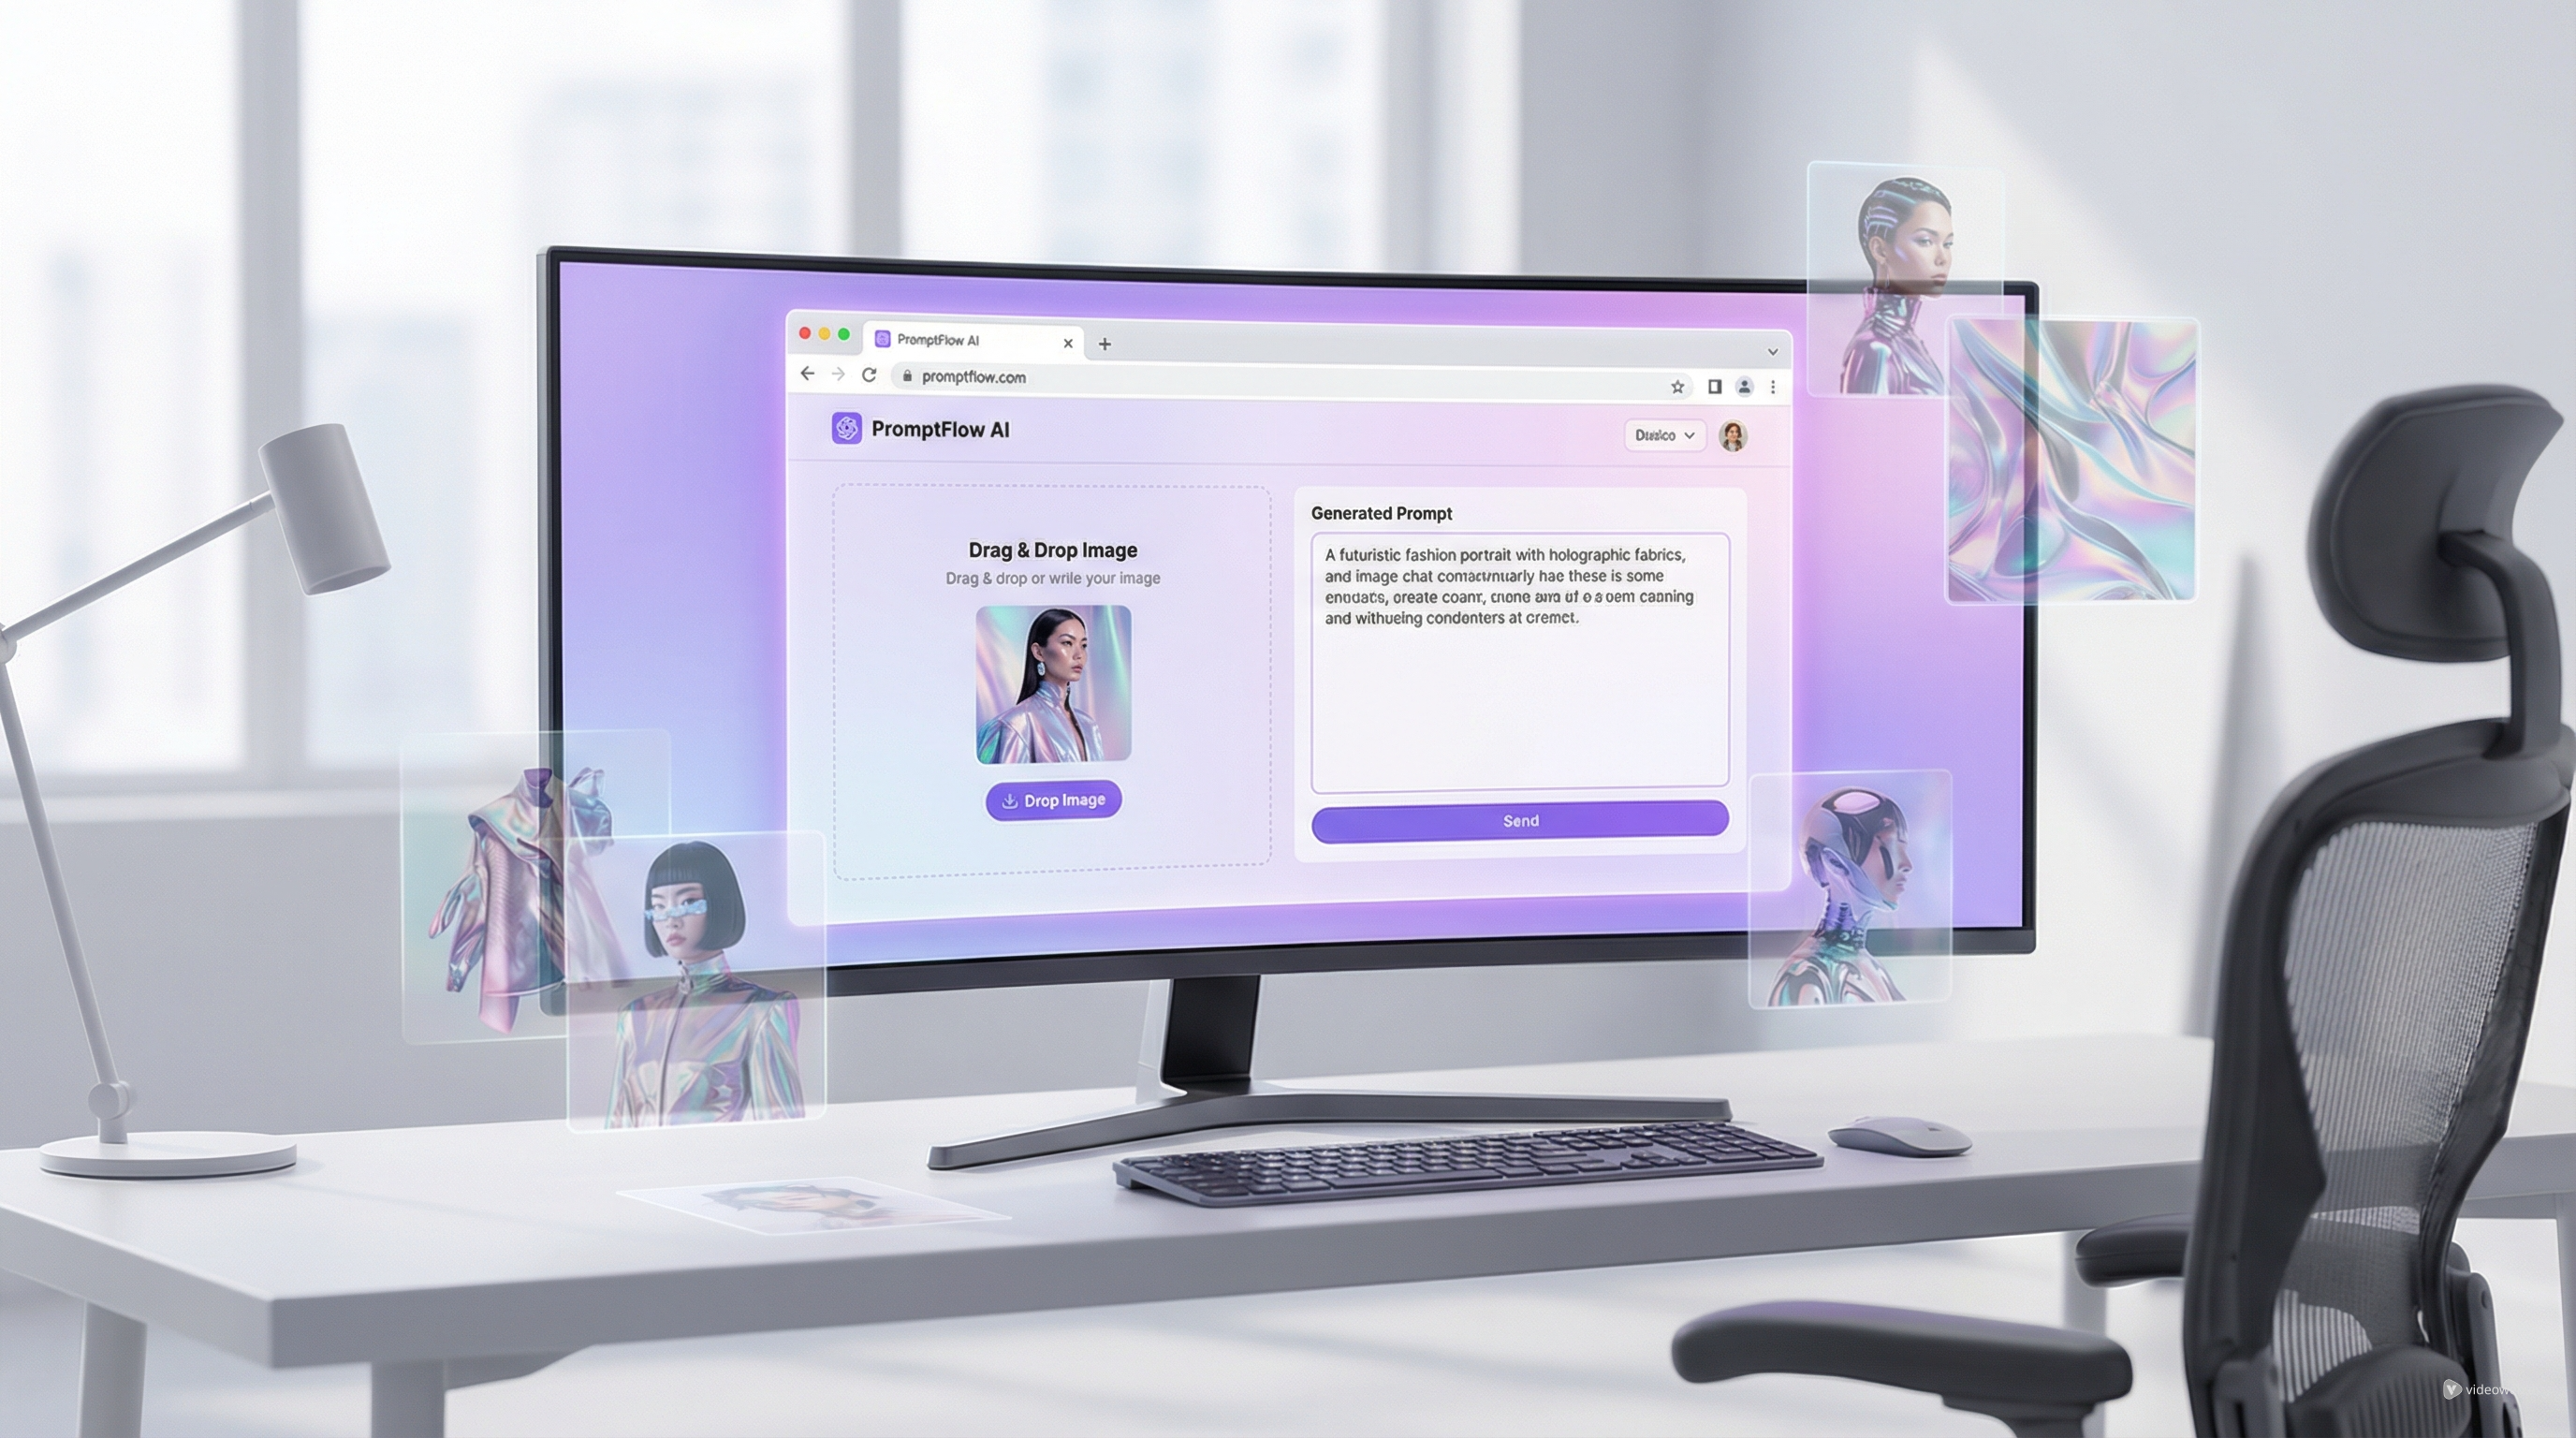
If you have ever found a great image and thought, “I want this style, but I do not know how to describe it,” AITryOn’s free image to prompt AI tool is designed for exactly that problem. Instead of guessing at keywords, you can upload a reference image, let the tool analyze it, and turn visual details into usable prompt text for different models.
This is especially useful for creators who want more consistent results across image generators. A good prompt does not just name the subject. It also captures the mood, composition, lighting, materials, camera angle, and visual style. A strong AI image prompt gives you a much better starting point than writing from scratch.
Why an image-to-prompt tool is useful
Many creators can judge visuals better than they can describe them. You may know that an image feels cinematic, editorial, dreamy, clean, hyperreal, or fashion-forward, but translating that into prompt language can still be difficult. That is where an image to prompt generator becomes practical.
Instead of forcing you to reverse-engineer every detail manually, the tool helps identify what is already present in the image. It can save time for moodboard work, ad creatives, character references, product image ideation, and fashion visuals. It is also helpful when you want to study how a generated image was built so you can reuse the same logic in future projects.
For beginners, this shortens the learning curve. For advanced users, it speeds up iteration.
Step 1: Upload a clear reference image
Start by visiting the tool and uploading an image with enough visible detail. In general, images work best when the subject is clear, the lighting is readable, and the scene is not too cluttered. A portrait, product shot, fashion photo, concept artwork, or clean cinematic frame will usually give better results than a blurry screenshot.
If your goal is style extraction, choose an image that strongly reflects the look you want to borrow. If your goal is subject recreation, choose an image where the subject, outfit, pose, and environment are easy to identify.
Think of the upload as your source material. The more readable the image is, the more useful the output from the image prompt generator tends to be.
Step 2: Choose the right prompt type for your model
One of the most useful parts of AITryOn is that it does not treat every model the same way. The interface lets you select different output prompt types, which helps align the wording with the model you plan to use next.
For example, if you want more model-specific output, you can generate prompts for Nano Banana 2 or adapt the result into more polished Nano Banana Pro prompts. If you work with visual styles that respond well to cinematic or descriptive prompt language, you can also prepare Midjourney AI prompts or tighter prompts for Midjourney.
This matters because not all models respond to the same structure. Some prefer dense descriptive text. Others work better with concise, weighted phrasing. Starting with the right prompt format can reduce cleanup work later.
Step 3: Generate the prompt and read it like a draft
Once your image is uploaded and the output type is selected, click the generate button and let the tool describe the image. The result should not be treated as a final masterpiece. Treat it as a draft.
A useful generated prompt usually includes the subject, setting, style cues, materials, color mood, lighting conditions, and composition details. That gives you a practical base prompt you can reuse, shorten, or expand.
For example, a fashion image might mention studio lighting, tailored garments, luxury editorial styling, soft shadows, and a clean backdrop. A fantasy image might identify dramatic atmosphere, glowing elements, painterly textures, and dynamic composition. This is where the AI image prompt becomes more than a caption. It becomes production-ready prompt material.
Step 4: Clean up the output for better results
Even a strong automatic result usually benefits from editing. Prompt generators are fast, but they can still include filler, over-description, or details you do not actually want.
A simple cleanup process works well:
- Remove anything inaccurate.
- Keep the strongest visual descriptors.
- Cut repeated adjectives.
- Add any missing details that matter to your goal.
- Adjust the wording to match your target model.
If you are building stylized outputs, you may want stronger art-direction language. If you are making product or fashion images, you may want cleaner wording and fewer abstract phrases. If you are testing Seedream 5 prompts, you may also want to make the structure more direct and visually focused.
In other words, the tool gives you speed, but your judgment gives you quality.
Step 5: Use it for practical creative workflows
The best way to understand this tool is to use it in real workflows instead of treating it like a novelty. A good image to prompt AI setup can support several common tasks.
For moodboards, you can upload inspirational images and turn them into prompt language you can remix. For product marketing, you can analyze competitor-style visuals and rebuild the aesthetic with your own subject. For fashion, you can study pose, fabric, lighting, and styling cues before creating new concepts. For concept art, you can extract the visual logic from an existing frame and then push it in a different direction.
This also helps when you are switching between tools. A reference image can become one prompt, then that prompt can be adapted for multiple generators. That is much easier than rebuilding the idea from zero every time.
Step 6: Know the limits of image-to-prompt generation
An automated prompt extractor is helpful, but it is not magic. It cannot always infer intent, brand goals, symbolism, or the exact visual priority you care about most. Sometimes it notices the background when you care about the outfit. Sometimes it focuses on the object when you care about the lighting.
That is why the smartest use of an image to prompt generator is collaborative, not passive. Let it handle first-pass description. Then step in and shape the output around your real goal.
A useful rule is this: use the tool to discover wording, not to replace creative direction.
Final thoughts
AITryOn’s free image-to-prompt tool is most valuable when you want to move from “I like this image” to “I can now describe and recreate this visual direction.” It turns reference images into working text, reduces prompt-writing friction, and makes model-specific prompting easier to manage.
Whether you want faster ideation, cleaner prompt drafting, or a bridge from visual inspiration to generation, this tool is a practical starting point. Upload a reference image, generate a prompt draft, refine it for your model, and treat the result as part of a broader creative workflow rather than a one-click shortcut.
Recommended tools to explore next
- Try other AITryOn creation workflows for visual experimentation, styling references, and fashion-oriented image generation.
- Use the generated prompt as a base for model-specific testing across Nano Banana, Seedream, Midjourney, Flux, or other image tools.
Related Article
- Best 10 Nano Banana Pro Prompt Guide for AI Try-On Image Generation
- Nano Banana Pro Prompt for Product Marketing: Fashion Images That Actually Sell
- Seedream AI 4.0 – Transforming Fashion with Bytedance’s Image Generator
- How to Create Authentic UGC Images with Virtual Try-On AI That Actually Convert